Notebooks
JupyterLab is a user-friendly tool for working with data and code. User can customize it by adding extra features and connecting it with other software. This makes organizing work and interacting with data easier. For more detailed information, please visit the JupyterLab documentation.
Terrascope offers a free of charge JupyterLab environment for users to work with the Terrascope datasets. Each notebook has direct access to the Terrascope datasets. The Terrascope JupyterLab environment is accessible after logging in into the Terrascope platform with the Terrascope credentials. The JupyterLab environment is located at the Terrascope JupyterLab site.
Notebooks are accessible after logging in into the Terrascope Jupyterlab Terrascope Notebooks site.
The notebooks service is subject to the Terrascope networking policy.
Notebook samples
By default, sample notebooks are provided in the folder /notebook-samples. At the end of 2021, Python 3.6 reached its end of life, so the platform-provided Python 3.6 interpreter is no longer available. The default Python interpreter will now be Python 3.11, which is already provided.
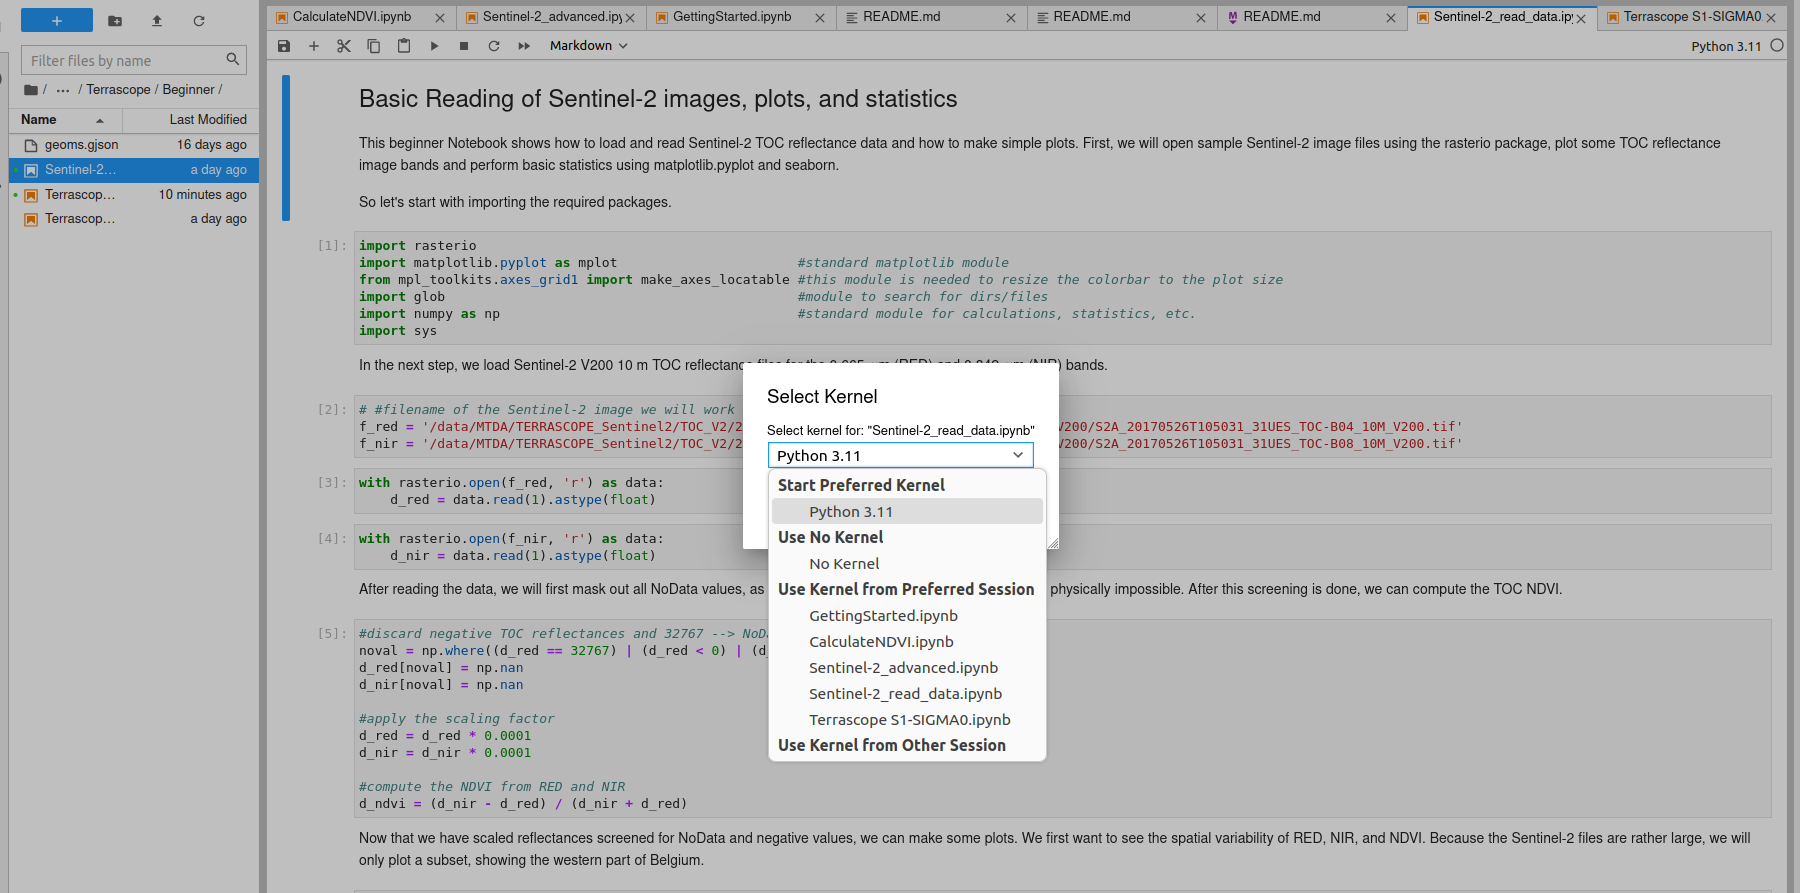
To change the Python version in the JupyterLab environment, click the current version indicator in the upper right corner, labeled ‘Switch kernel’ when hovered over. A drop-down box will appear (see Figure 1), enabling selection of the preferred version. By default, sample notebooks are located in the folder /notebook-samples.
The samples are divided in two sections: Terrascope and OpenEO samples.
Terrascope Samples:
- Beginner: Notebooks that explain basic data reading and analysis principles, located in
/notebook-samples/terrascope-samples/Terrascope/Beginner - Advanced: Notebooks that explore various datasets and extended data analysis tools, located in
/notebook-samples/terrascope-samples/Terrascope/Advanced
OpenEO Community Samples:
- A wide variety of community-contributed OpenEO samples showcasing different use cases. All Python Notebooks can be found in
/notebook-samples/openeo-samples/python. - More information about these Python notebooks, including descriptions of the use cases they demonstrate, can be found in the README.md file in the Python directory.
To ensure the latest version of the samples are availble, these notebooks are automatically updated for each user on Monday at 2am.
The update process is includes:
- The local changes are stashed (
git stash -U) - Next, new commits for repository and submodules gets pulled with
git pull --rebase --recurse-submodules. - Finally, the submodules are updated to ensure that when a new submodule is added, the repository will also contain the new submodule. This is done with
git submodule update --init --recursive.
To get the local changes back, users can execute git stash pop. This resets the local changes, but it is possible to have some merge conflicts.
Notebook Git pull
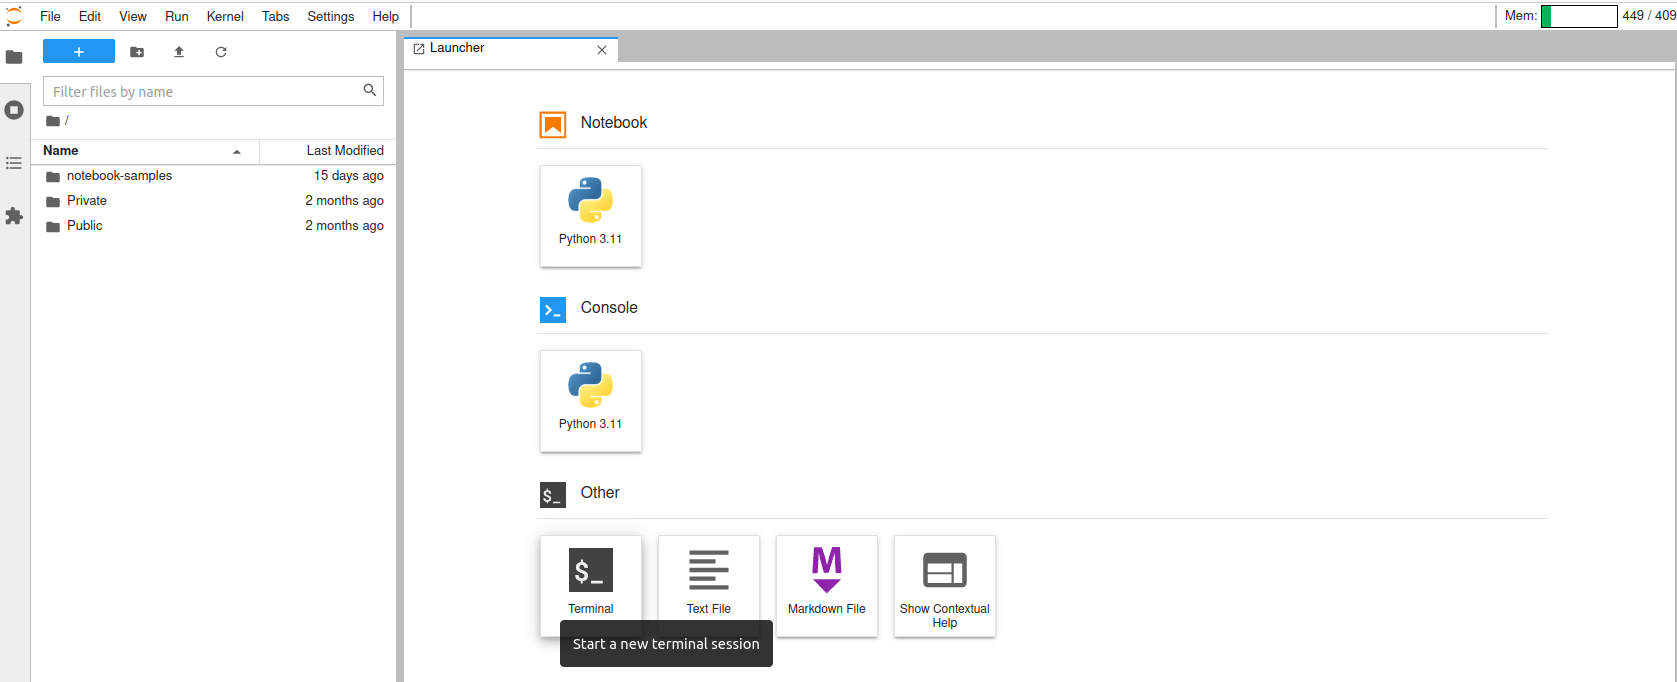
To obtain the most recent version of Notebooks, users can pull from the Terrascope Notebook Git repository. If a user hasn’t opened one of the sample Notebooks, the JupyterLab environment will display the Launcher (see Figure 2). In the Launcher, select ‘Terminal’ under the ‘Other’ category.
The Launcher can also be accessed by clicking the + in the upper left corner of the screen. Once the Terminal is open, users can verify the current directory using the pwd command, which should typically be /home/users/<username>.
To store the pulled Notebooks in a different location, such as /data/users/Private/<username>, users can change directories using the cd command accordingly.
In the required directory, pull from the Terrascope Notebook Git repository using the command git pull --recurse-submodules.
Sharing notebooks
Notebooks can be shared with other Terrascope users by placing them in the Public folder, from where another user can copy them. Here’s how to proceed: Assume user1 wants to share a notebook with user2.
First, open a Terminal window in the Notebook environment (see Figure 2).
Then, navigate to the folder from where the files should be copied and use cp <source_path> /data/users/Public/user1/, for example:
cp /data/users/Private/user1/notebook-samples/Terrascope/Advanced/Sentinel-2_advanced.ipynb /data/users/Public/user1/The notebook then becomes accessible to other users in the Public folder.
Installing additional packages
Users can install additional Python packages in two ways within the Notebook environment:
- Using Terminal:
- Open the terminal from the Launch tab (see Figure 2).
- Activate the python3 environment with
conda activate python3. - Install the package with
pip install cyclopts --user.
- Within a Notebook Cell:
- Add a new cell with
pip install cyclopts --userfor Python 3.11 notebooks.
- Add a new cell with
Packages installed with the ‘–user’ flag are stored in the user’s home directory. This ensures persistence across notebook when it restarts. However, installing other packages might lead to issues if new dependencies are introduced in the future. For temporary installations, users can use pip install without ‘–user’ or conda install. Use conda install -n python3 to install packages in the python kernel.
Basic Notebook commands
Working with a Notebook is pretty convenient and the supporting text should enable a quick understanding of the presented code. Some basic Notebook commands are listed below.
| Keyboard shortcut | Command |
|---|---|
Ctrl + Enter |
Run cell |
A |
insert cell above current cell |
B |
insert cell below current cell |
C |
copy cell code |
V |
paste cell code |
DD |
delete selected cell |
M |
change cell to Markdown (text) mode |
Some additional Notebook keyboard shortcuts and a Notebook tutorial can be helpful for additional information.
Restart Jupyterlab environment
In some cases (e.g., after updating the JupyterLab environment), users may need to restart their JupyterLab container. Here’s how to do it:
- Go to
Help>Launch Classic Notebookin the menu bar. - Click the
Control Panelbutton in the upper right corner. - Press the
Stop My Serverbutton. - After waiting a few seconds, click the
Start My Serverbutton to initiate a new JupyterLab instance.