Registration and authentication
Terrascope services are available to all users, with some services requiring authentication. Users can freely explore and visualize the data and services offered by Terrascope, but registration and authentication are required to access more advanced features.
Why Register?
Registering with Terrascope grants access to advanced services and tools that enhance the user experience. Some key examples include:
- Explore and Download Data: The Terrascope Viewer allows users to explore and visualize data without registering. However, users must sign up to download data, save specific areas of interest, or obtain time series data for those areas.
- Join the Community: To participate in discussions, post messages or ask questions on the forum, a user needs a Terrascope account.
- Use Jupyter Notebooks: Registered users can access interactive Jupyter Notebooks for more advanced data analysis. This powerful tool enables a more profound exploration of the available data.
- Access Virtual Machines: Users requiring additional computing power can request a virtual machine. Registration is necessary to access and utilize these virtual machines, providing a more robust environment for their work.
Therefore, this page provides detailed instructions on the registration and authentication process, including how to create a Terrascope account, use an external identity provider, and update a user profile.
To access protected Terrascope services, users can create a new account or utilize an existing one from a supported external identity provider. For openEO services, registration through the external identity provider EduGAIN & social logins is necessary, separate from the initial registration for other Terrascope services.
Logging in to Terrascope
The following options are available for logging in to Terrascope:
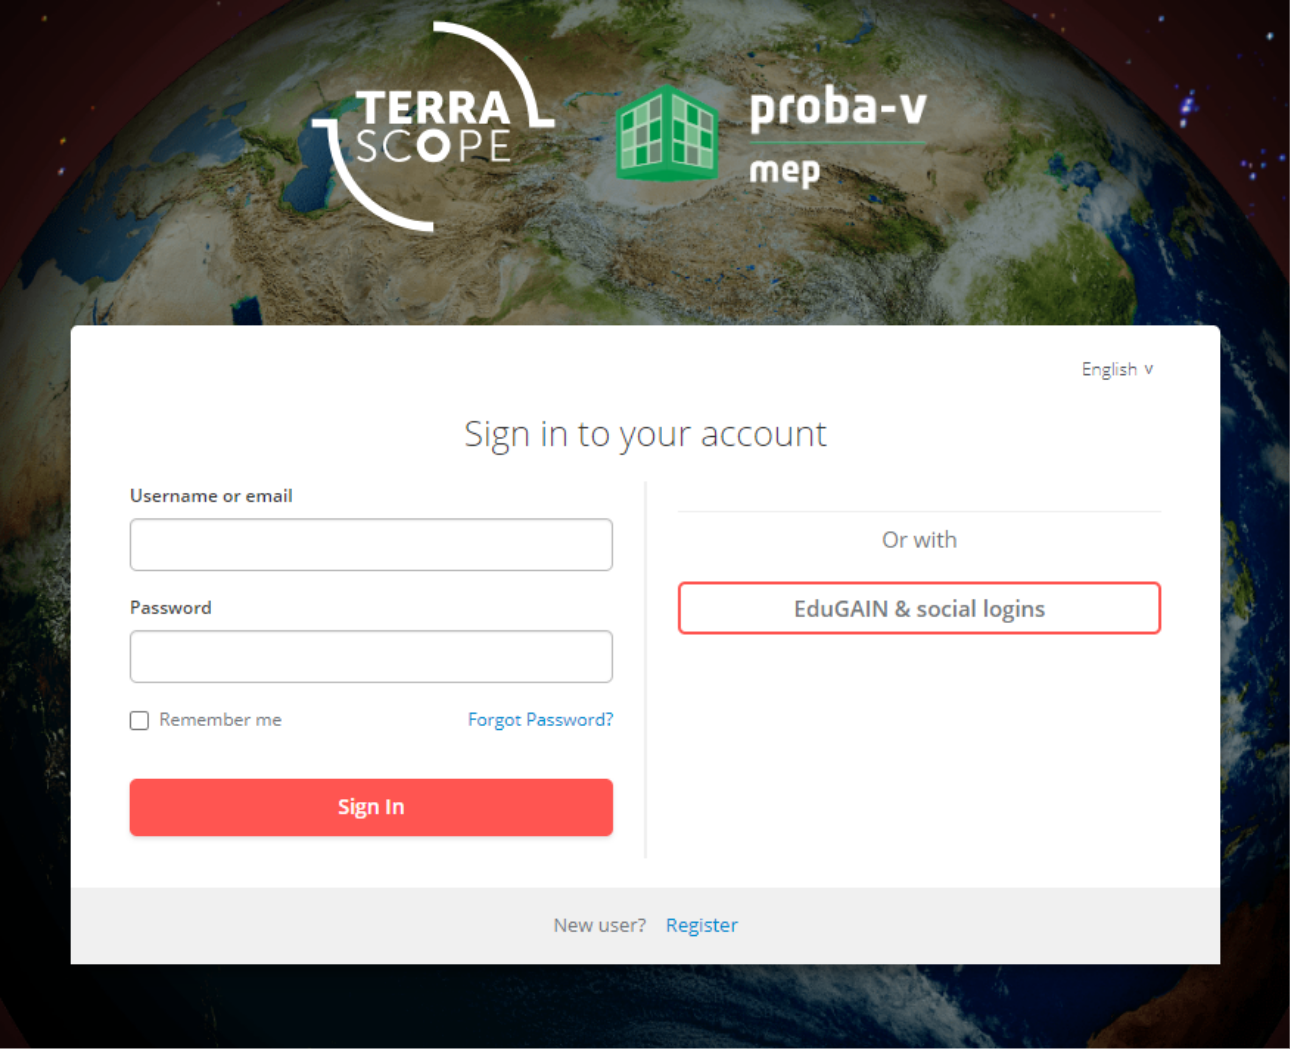
Option-1: Register a new account
To create a new Terrascope account, users can click on the register link located at the bottom of the login page. This opens the Terrascope registration box, where users must provide a Terrascope username and password, among other details.
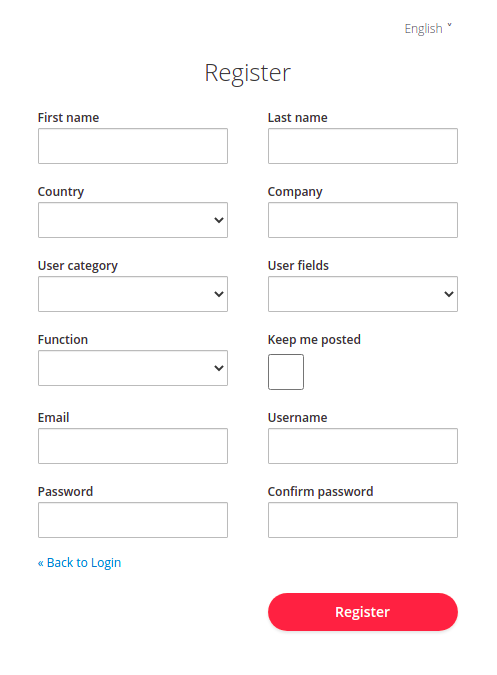
Upon (un)checking the ‘Keep me posted’ checkbox, users can choose whether to (un)subscribe from the Terrascope mailing list. After filling out the registration page, sign in using the credentials entered in the form.
However, if users want to access openEO services, they must also register through EduGAIN & social logins. This is a separate registration process, as described in the next section.
Option-2: Registering through external identity provider
Terrascope supports external identity providers, allowing users to sign in using accounts from supported providers. This includes immediate access using one of these providers.
Through EduGAIN & social logins, users can sign in using an EduGAIN account or one of the supported social login providers (such as Google, Facebook, etc.).
Additionally, as previously mentioned, users must register using EduGAIN & social logins to access processes and services offered by openEO. Registration through EduGAIN & social logins is also required for services provided in EOplaza.
Terrascope also supports the Copernicus Data Space Ecosystem as an external identity provider. It is possible to sign in and register an account on Terrascope using a Copernicus Data Space Ecosystem account.
Using an external identity provider simplifies the login process. A Terrascope account is created automatically without users noticing. They only need to provide additional information by submitting the form shown in the figure below:
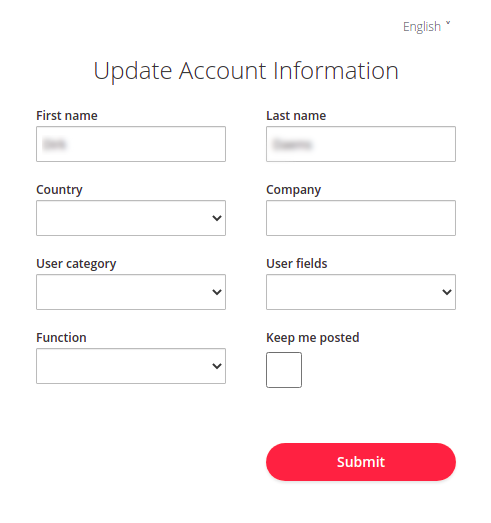
If the user wants to start using a Terrascope Virtual Machine, a password must be set for an auto-generated Terrascope account. Therefore, in this case, “Option-1” is recommended.
Updating your profile
The user can update their Terrascope profile on the update profile page. On this page, they can modify their Terrascope profile properties.
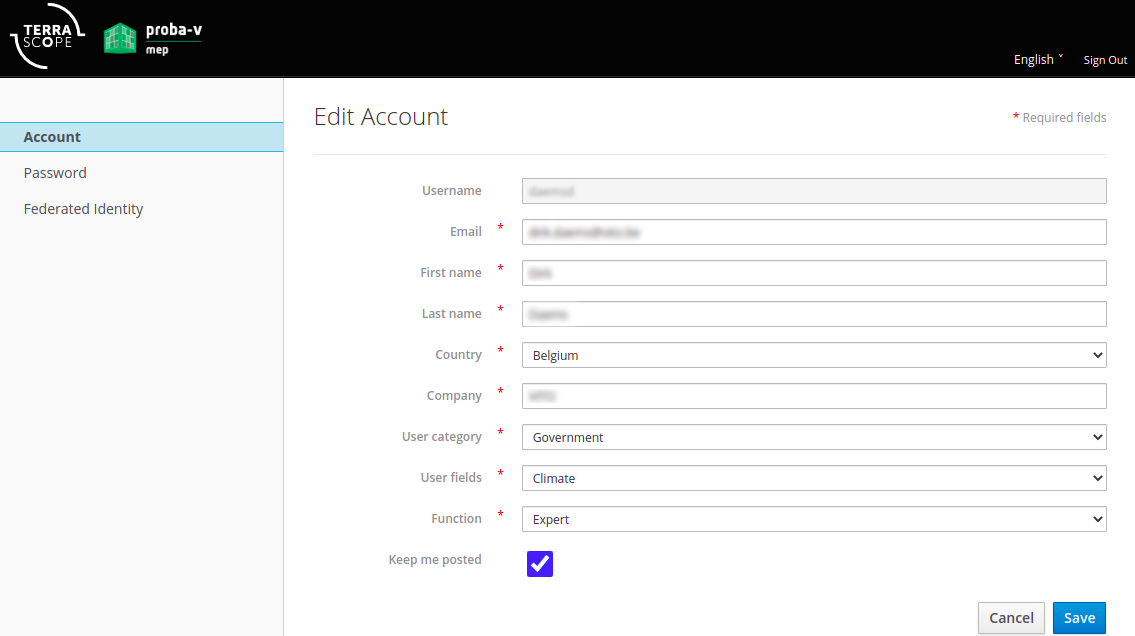
Users can also view and manage the external login accounts linked to their Terrascope account.
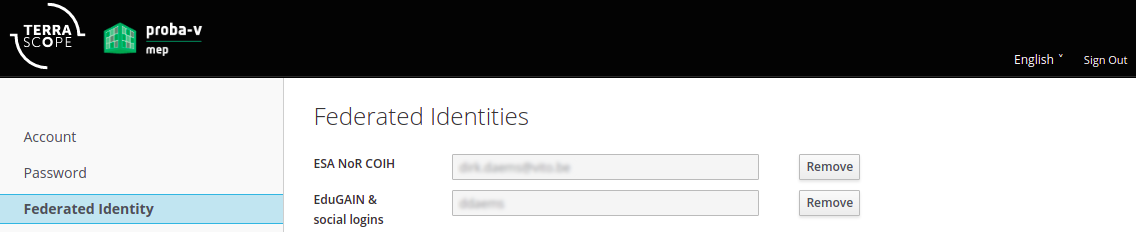
For those interested in using openEO services, ensure that EduGAIN & social logins are available under the ‘Federated Identities’ tab.
Access and refresh tokens
Certain Terrascope services require token authentication. Users can request an access token to access these services. The OpenID Connect (OIDC) Direct Access Grant, also known as the OAuth2 Resource Owner Password Credentials Grant, enables users to obtain an access token by providing their username and password.
Request token
To get an access token, send a POST request to the token endpoint: https://sso.terrascope.be/auth/realms/terrascope/protocol/openid-connect/token.
The request should contain the following parameters:
grant_type:passwordclient_id:publicusername: your Terrascope usernamepassword: your Terrascope password
This will result in the following HTTP request:
curl --location 'https://sso.terrascope.be/auth/realms/terrascope/protocol/openid-connect/token' \
--header 'Content-Type: application/x-www-form-urlencoded' \
--data-urlencode 'grant_type=password' \
--data-urlencode 'client_id=public' \
--data-urlencode 'username=<username>' \
--data-urlencode 'password=<password>'
The response will look like the example below:
{
    "access_token": "eyJhb...",
    "expires_in": 300,
    "refresh_expires_in": 3600,
    "refresh_token": "eyJhb...",
    "token_type": "Bearer",
    "not-before-policy": 0,
    "session_state": "...",
    "scope": "profile email"
}
The provided access token can now be used to access supported services. The access token is included in the Authorization header of the request to the service, for example, for downloading WorldCover data:
curl --location 'https://services.terrascope.be/download/WORLDCOVER/ESA_WORLDCOVER_10M_2020_V100/MAP/ESA_WorldCover_10m_2020_v100_N00E006_Map/ESA_WorldCover_10m_2020_v100_N00E006_Map.tif' \
--header 'Authorization: Bearer eyJhb...' \
Refresh token
The token obtained previously expires after a certain period. To avoid repeatedly requesting a new access token with user credentials, it is possible to refresh the token using the refresh token provided in the response.
This can be achieved by sending a POST request to the token endpoint with different parameters:
grant_type:refresh_tokenclient_id:publicrefresh_token: the refresh token provided in the previous call to the token endpoint
This generates the following HTTP request:
curl --location 'https://sso.terrascope.be/auth/realms/terrascope/protocol/openid-connect/token' \
--header 'Content-Type: application/x-www-form-urlencoded' \
--data-urlencode 'grant_type=refresh_token' \
--data-urlencode 'client_id=public' \
--data-urlencode 'refresh_token=eyJhb...'
The response to this request includes both an access token and a refresh token.