Jupyter Environment
JupyterLab is a user-friendly tool for working with data and code. Users can customize it by adding extra features and connecting it with other software. This makes organizing work and interacting with data more manageable. For more detailed information, please visit the JupyterLab documentation.
Terrascope users can use it for free and have direct access to the Terrascope datasets. The Terrascope JupyterLab environment is accessible after logging into the Terrascope platform with its credentials.
Currently, we support two lab environments:
- Terrascope: environment targeting the Terrascope services
- Worldcereal: environment for ESA Worldcereal project demonstrations
The notebooks service is subject to the Terrascope networking policy.
Terrascope notebook samples
The Terrascope JupyterLab environment comes with a number of notebook samples. The default Python interpreter for the Terrascope environment is Python 3.12, which is already provided.
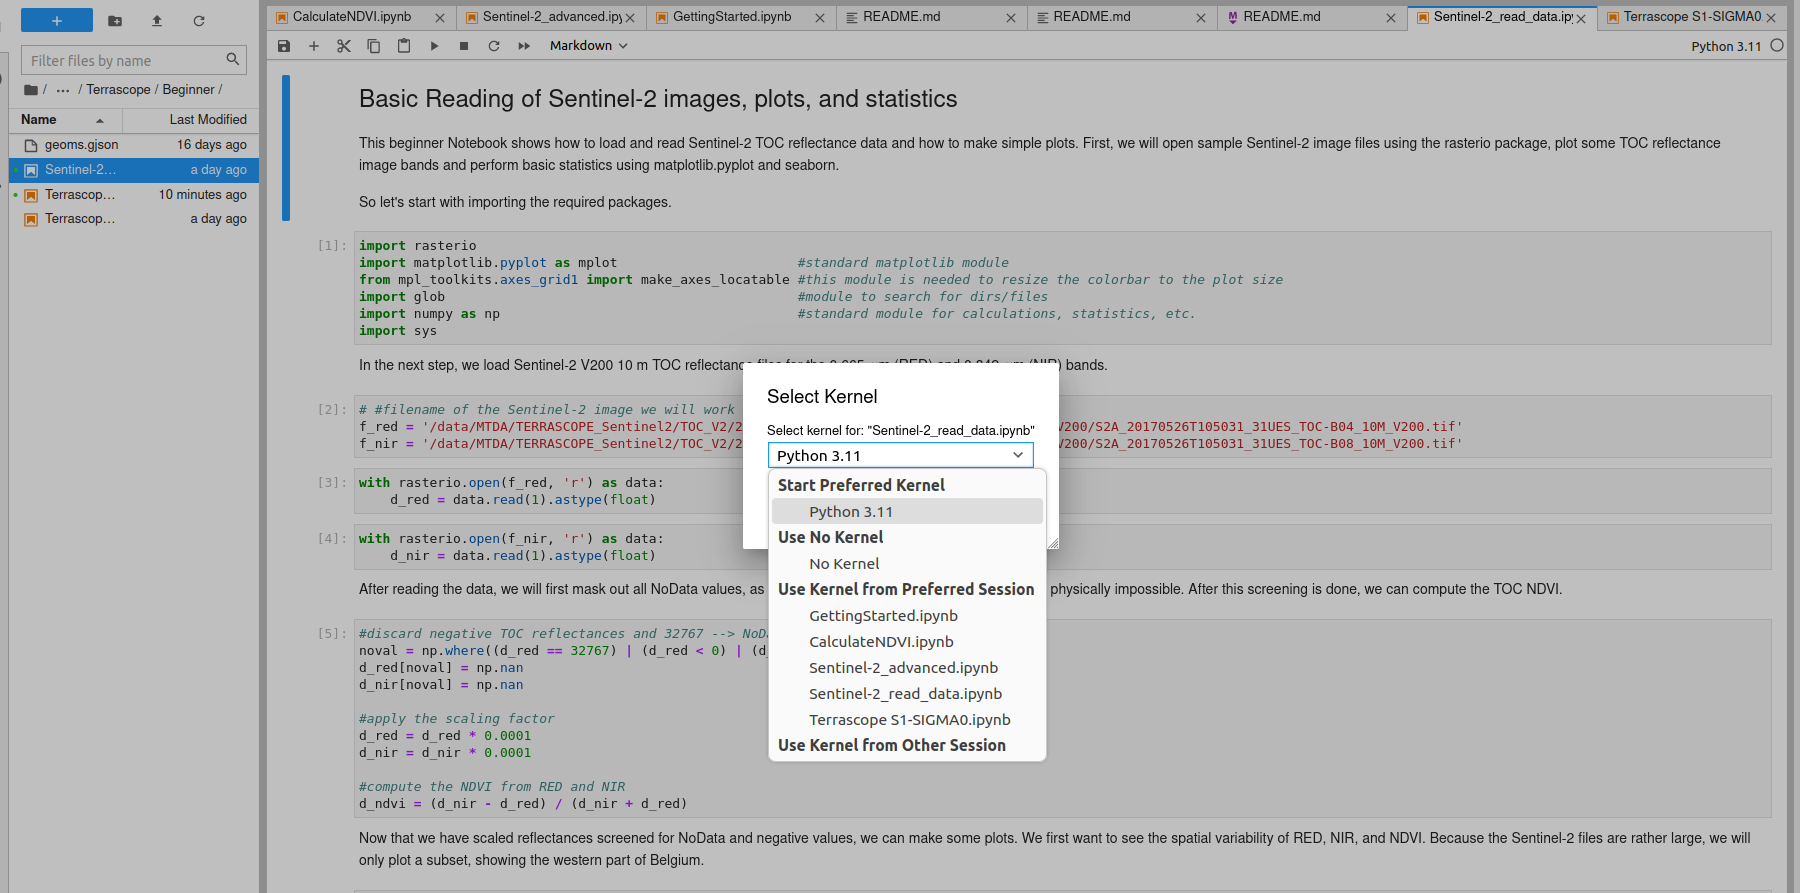
To change the Python version in the JupyterLab environment, click the current version indicator in the upper right corner, labelled ‘Switch kernel’ when hovered over. A drop-down box will appear (see Figure 1), enabling the selection of the preferred version.

By default, sample notebooks are in the folder /notebook-samples. All these samples are adapted to the Python 3.12 interpreter.
These samples are divided into two sections: Terrascope and OpenEO samples.
Terrascope Samples:
- Beginner: Notebooks that explain basic data reading and analysis principles, located in
/notebook-samples/terrascope-samples/Terrascope/Beginner - Advanced: Notebooks that explore various datasets and extended data analysis tools, located in
/notebook-samples/terrascope-samples/Terrascope/Advanced
OpenEO Community Samples:
- A wide variety of community-contributed openEO Python examples showcasing different use cases can be found in
/notebook-samples/openeo-samples/python. - A brief description of the use case is provided in the README.md file in the Python directory.
To ensure the latest version of these samples is available, these notebooks are automatically updated when a user starts the JupyterLab. Local changes are stashed and new commits for the samples repository and submodules are pulled. To get the local changes back, users can execute git stash pop. This resets the local changes, but it is possible to have some merge conflicts.
Installing additional packages
Users can install additional Python packages in two ways within the Notebook environment:
- Using the terminal:
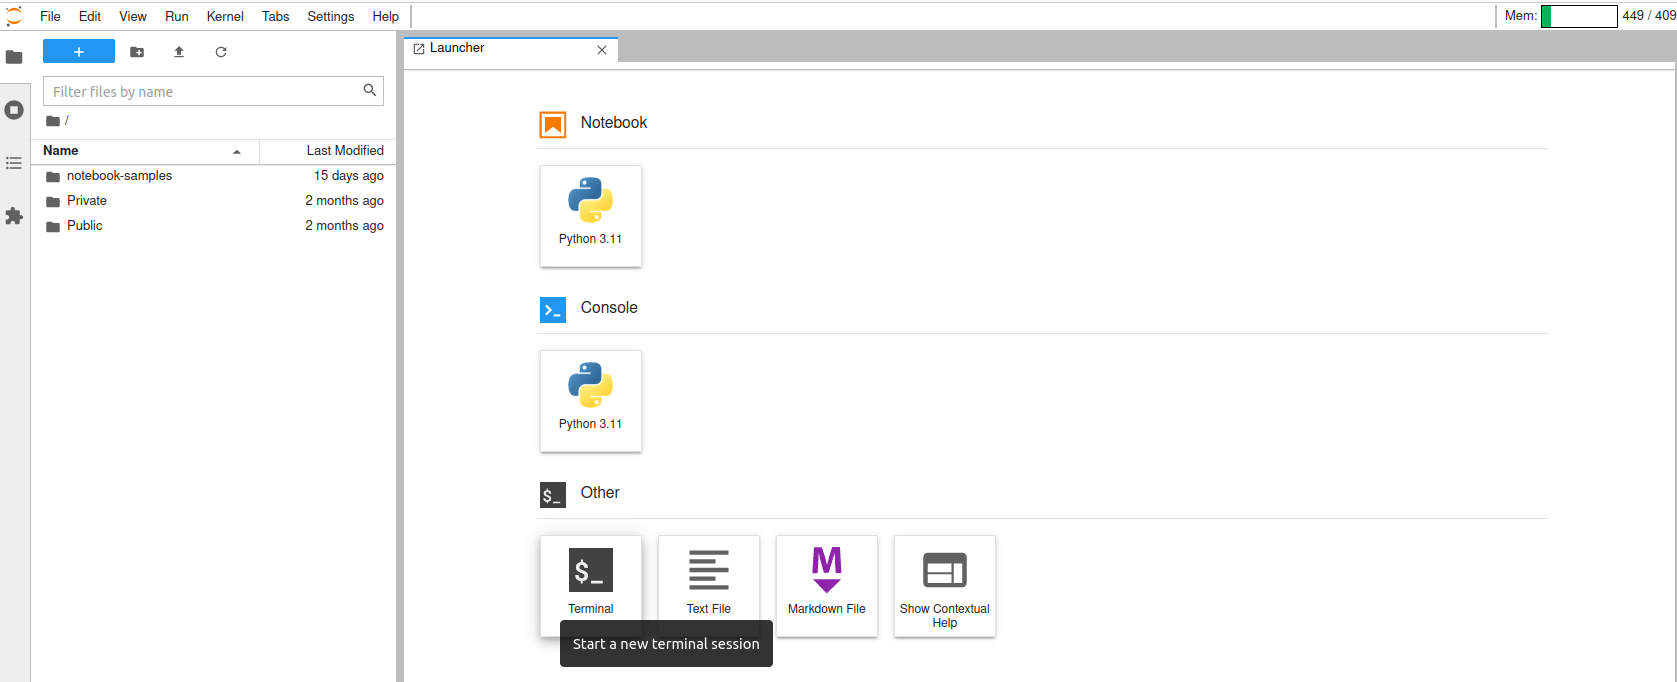
- Open the terminal from the Launch tab (see Figure 2).
- Install the package with pip or conda inside the
python3virtual environment.
- Within a notebook cell:
- Add the following command to a cell to install a package directly from within the notebook:
!pip install <package>
- Add the following command to a cell to install a package directly from within the notebook:
Note: User-installed packages are non-persistent across sessions. This means they must be reinstalled after JupyterLab restarts. Previously, this could be bypassed with the –user flag, but these installs are now also non-persistent to avoid confusion and version conflicts.
Basic Notebook commands
Working with a notebook is convenient, and the supporting text should enable a quick understanding of the code presented. Some basic Notebook commands are listed below.
| Keyboard shortcut | Command |
|---|---|
Ctrl + Enter |
Run a cell |
A |
insert a cell above current cell |
B |
insert a cell below current cell |
C |
copy a cell code |
V |
paste a cell code |
DD |
delete a selected cell |
M |
change a ell to Markdown (text) mode |
Some additional Notebook keyboard shortcuts and a Notebook tutorial can be helpful for additional information.
Restart Jupyterlab environment
In some cases (e.g., after updating the JupyterLab environment), users may need to restart their JupyterLab container. Here’s how to do it:
- Go to
File>Hub Control Panelin the menu bar. - Press the
Stop My Serverbutton. - After waiting a few seconds, click the
Start My Serverbutton to initiate a new JupyterLab instance.

